

Set Up Check-In Stations and Kiosks
A check-in station is any computer or tablet your church uses to check people in. It can be staffed, with a volunteer checking families in, or a self-serve kiosk where families check themselves in. Set up each station once, and it's ready every week.
Before you start
A label printer. Empower works with Dymo, Brother, Zebra, and other label printers. See Setting up a Label Printer for Empower.
QZ Tray on the computer connected to the printer. Empower uses this small, free program to print name tags. It runs on Windows and Mac.
Add a station
Go to Utilities > Options.
Under Check In, click Manage Workstations.
Click Add New Workstation.
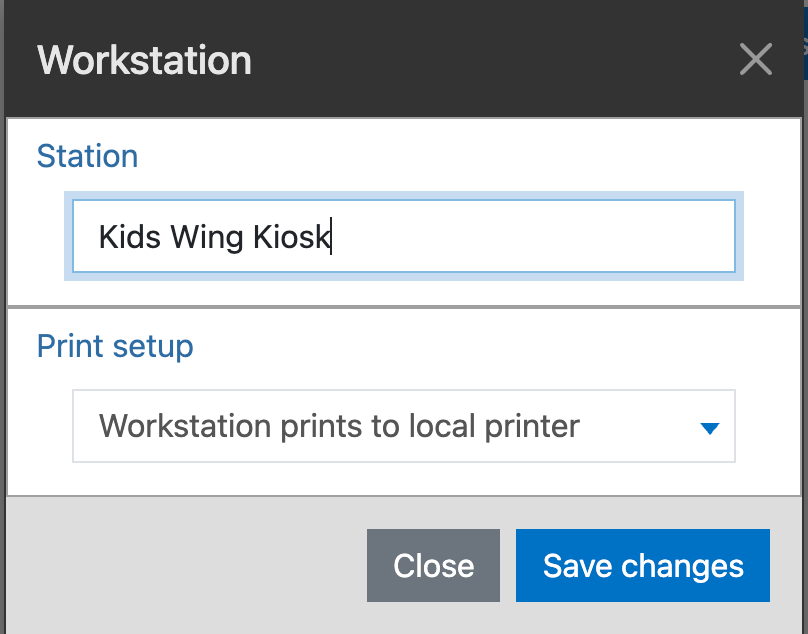
Enter a Station name that tells volunteers where it is, like Kids Wing Kiosk. Names can be up to 20 characters.
Under Print setup, choose whether this station prints to a local printer (plugged into this computer), a network printer, or does not generate tags.
Click Save changes.
Choose what prints on each tag
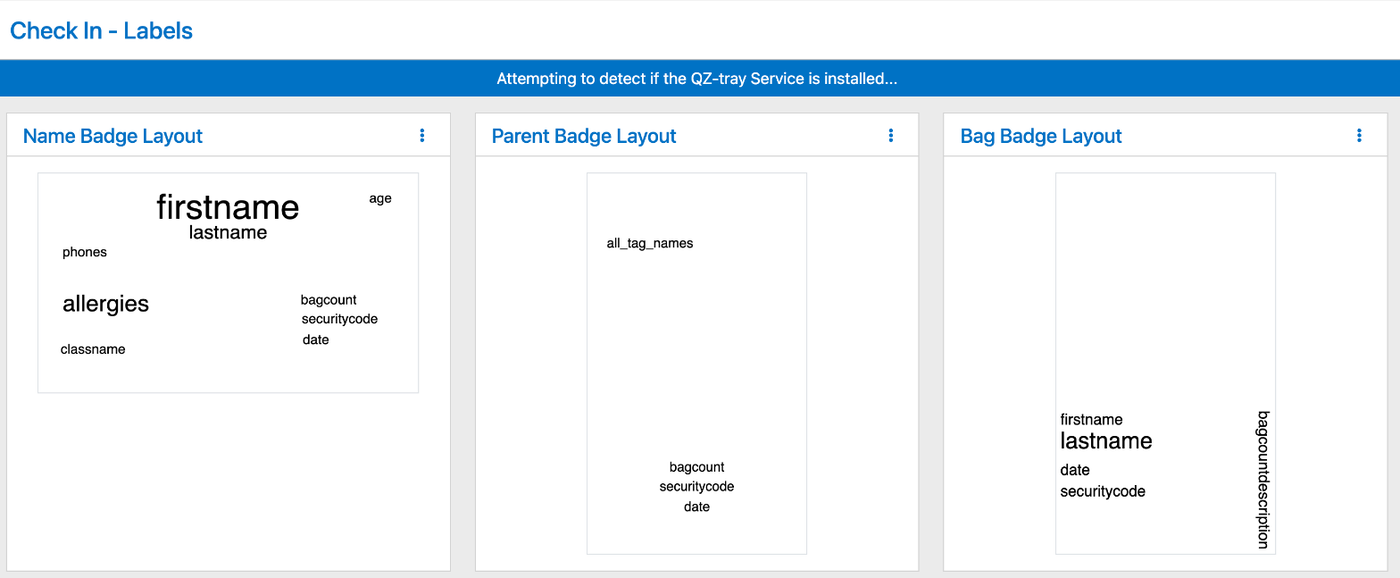
Under Utilities > Options > Check In, click Labels to see your three layouts:
Name Badge: the tag worn by the person checking in.
Parent Badge: the tag the parent or guardian keeps for pickup.
Bag Badge: a tag for a child's bag.
Each layout includes a security code. Use the menu (three dots) on a layout to change it.
Start checking people in
Staffed station
On the station computer, sign in to Empower and go to Check In > Manned Check In.
The first time, pick the station under Select from existing stations and choose its print setup. If it prints to a local printer, choose the printer, then click Save changes.
Self-serve kiosk
Set the kiosk PIN under Utilities > Options > Check In > Self Check In PIN.
On the kiosk, open your church's Empower sign-in page and click Self Check-in in the bottom corner.
Related articles
Setting up a Label Printer for Empower
Using the Check In Portal
The Check-In Process