General Setup
It’s like a new beginning! Empower is a part of your ministry now, and we couldn’t be more excited.
Let’s take a minute and walk through what to expect when getting started. Empower is incredibly customizable for each church/ministry. Getting things set up correctly from the start will help make your transition a lot easier. Don’t forget; that we’re always here to help at our Contact Support page.
Things to look forward to in this series of articles:
-
Your Domain and Login
-
Adding Basic Church Information
Signing up for your Free Trial of Empower ChMS
It all begins with the trial! We don’t want you to commit to something that isn’t going to work out. We want you to take a test drive. If you don’t think we can work together- no risk, no worries!
Even if you’re confident and ready to dive in, we will use the Free Trial to set up your new account. Let’s walk through how that looks.
When you're ready to sign up for Empower, visit www.empowerchms.com. Click the banner/button that says “Start Your 60 Day No-Risk Trial”. You will not need a credit card, and there is no commitment.
-
Enter your name.
-
Enter your email address.
-
Enter your subdomain (Church Name or an Abbreviation of). The subdomain must begin and end with a letter or number and can only contain letters, numbers, and hyphens. This domain cannot be changed later.
Click Start Trial
You will immediately receive an email. Confirm that email by clicking the link included and it will take you to the setup page. On this page, you will begin completing your church’s account information.
Keep in mind all of this information (other than the subdomain) can be changed later.
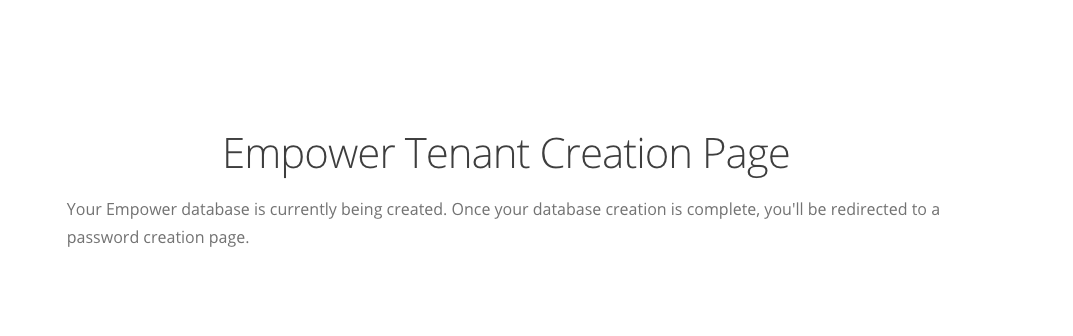
After clicking your confirmation email you will be redirected to the Empower Tenant Creation Page. This could take a moment, depending on your internet connection. This step is where our system begins to compile your Empower database. After this is complete, you will be redirected to the password creation page.
Your Domain and Login Information
Your administrative user will use the email you signed up with and the initial password you created to login. This can be updated later.
After creating a password for your account, you will be redirected to your set up page to continue the initial setup.
Your subdomain is important to remember. To access your account directly, each user will type yoursubdomain.empowerchms.com into the web browser. This will take you directly to your church’s login page.
It would be a great idea to add a bookmark (link in your browser) during your first visit.
Adding your basic Church Information to Get Started
After first logging into your account and creating a password, you will automatically be prompted for some basic information about your church. We’ll detail the steps below:
-
Setting up Church Name and Time Zone
-
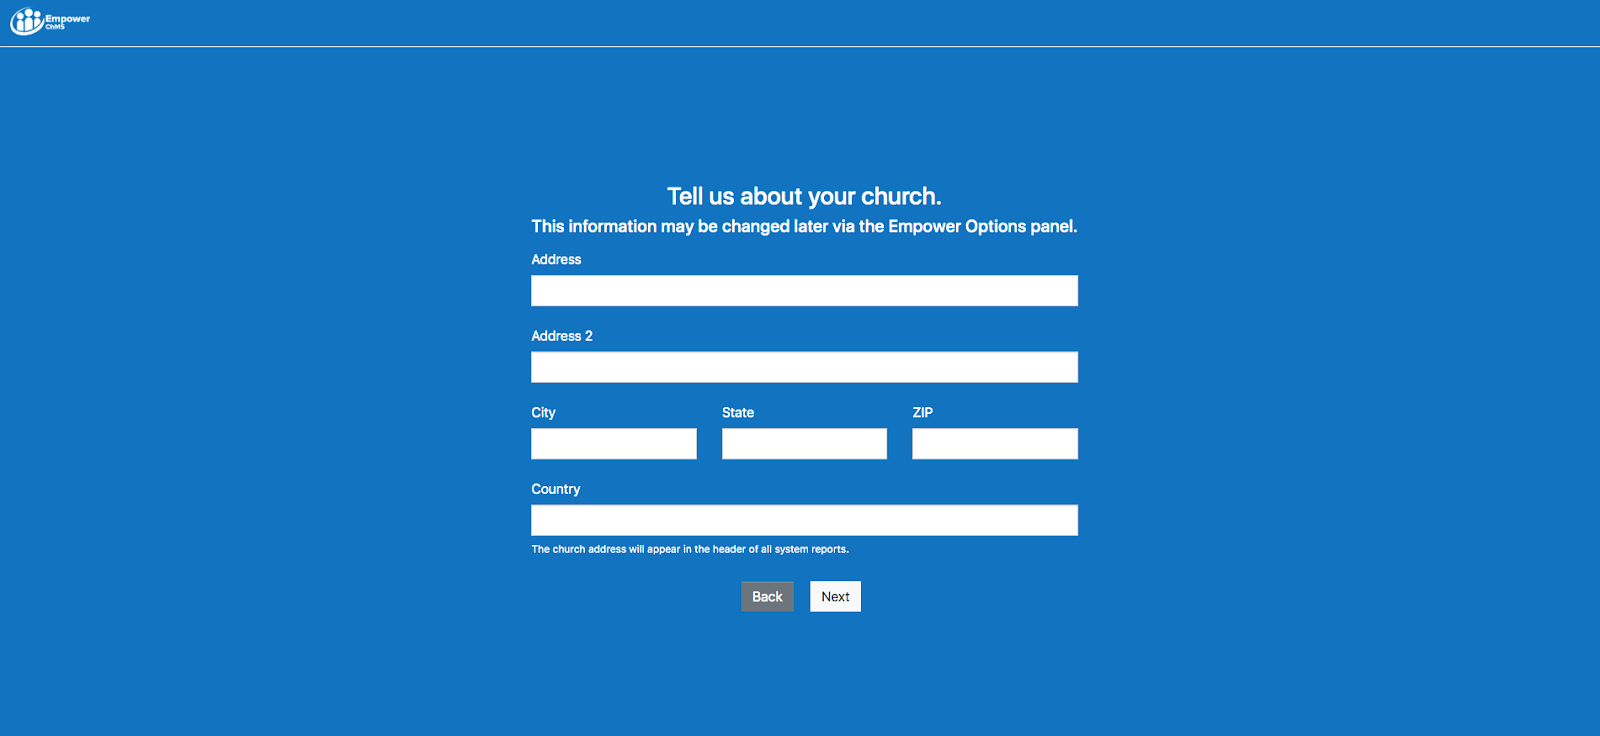
Church Address
-
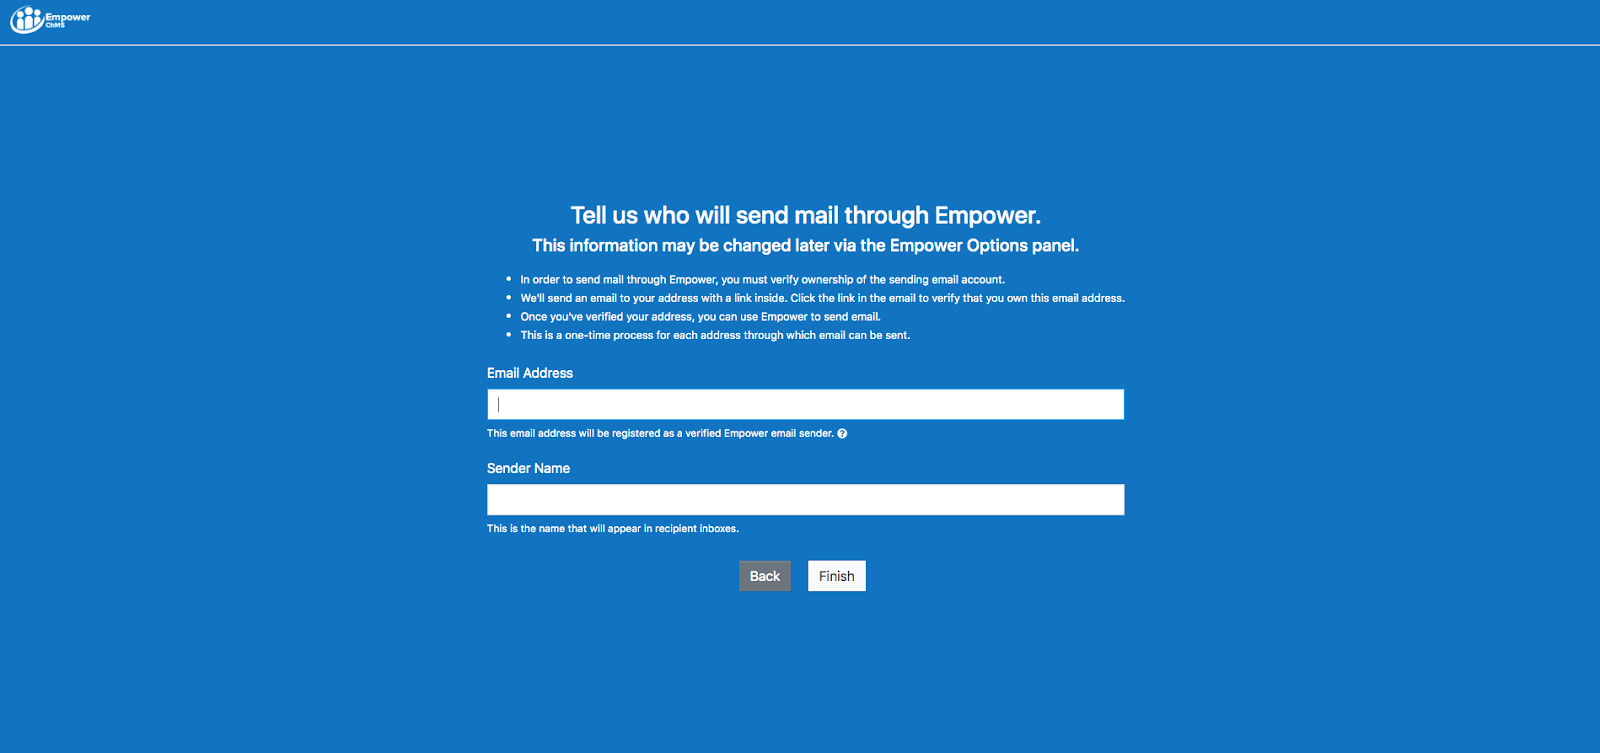
Verified Sender’s Email (this is the main email that Empower will send emails from)

All of these details can be edited later inside your Empower Account.
Once these prompts are completed, you’re ready to enjoy your Empower Church Management Software.
For more information about editing this information and completing your church’s basic information, here are a few more support articles you might be interested in:
- Setting Up your Church Name, Contact and Time Zone
-
Uploading your Church Logo