Using the Check In Portal
The Check-In tool in Empower is built to give you both data and peace of mind. Check-In takes attendance for the selected events and also gives the option to print name tags for attendees and pick-up receipts for guardians.
Empower is built to work with multiple brands and models of label printers making it one of the most versatile check-in systems on the market today.
In this article, we will walk through the elements of the Check-In tool.
To skip to The Check-In Process support article, click here.
Dashboard
After clicking on the Check-In tool in the Top Menu, it will load the Check-In Dashboard.
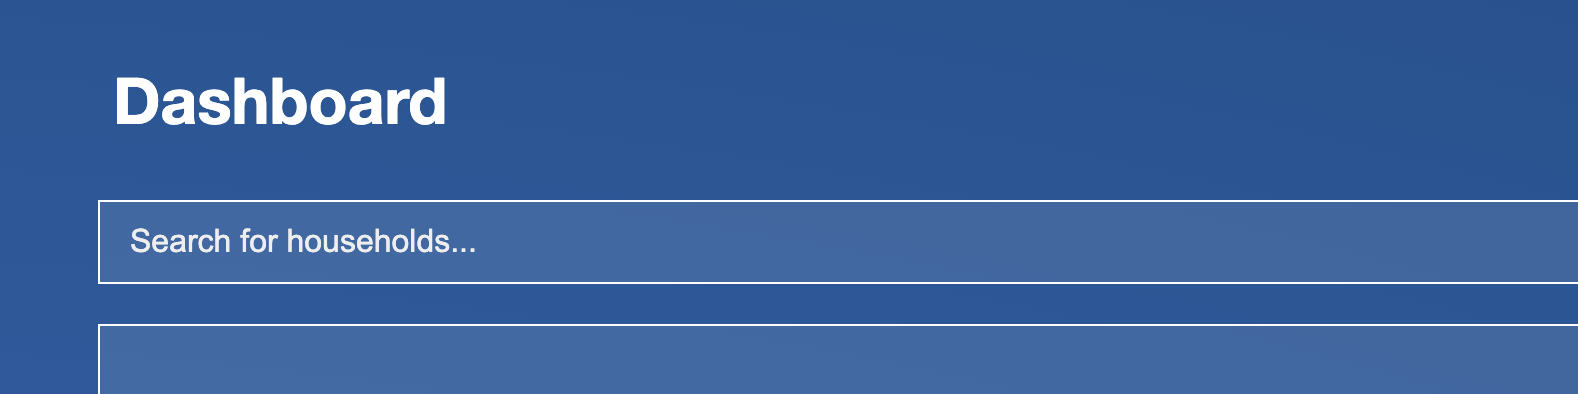
This Dashboard will be the screen that we will begin all check-in processes from.
To return to the dashboard from another page in the Check-in system, simply click on the Empower ChMS logo in the top left corner of the screen.
Activities
The first thing that we will take not of are the Activities that are listed on the Dashboard.
These are all of the activities that currently allow you to check-in attendees.
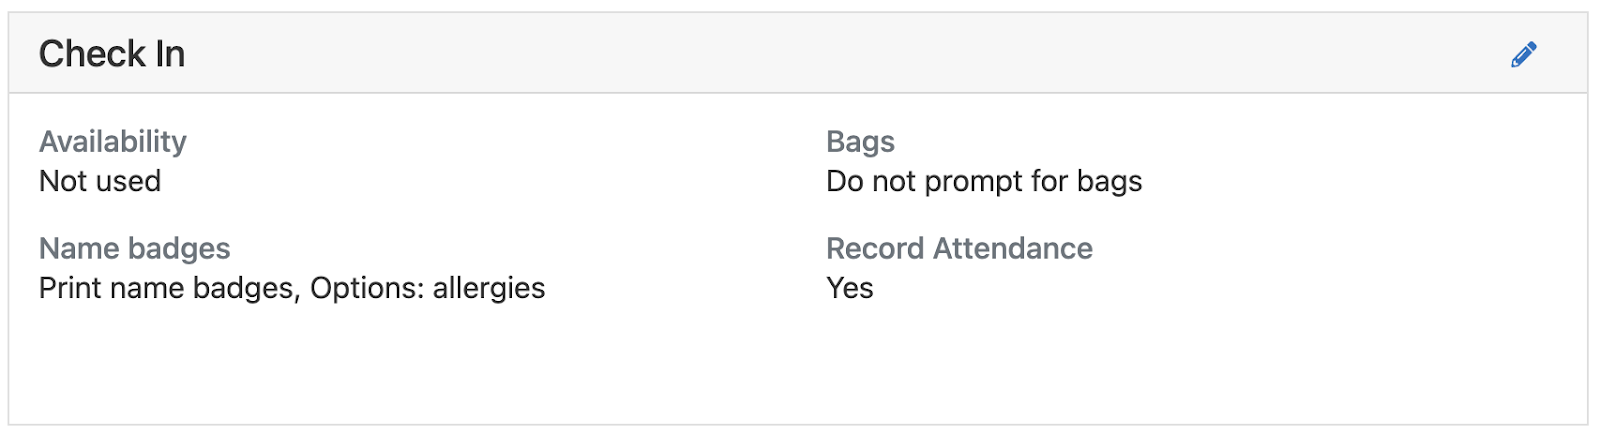
If you are attempting to search for an event that is not currently listed, you will need to check the settings for that event on the Membership>Activities page in the Check-In profile field.
This is also where you will determine whether a label will be printed for checkin, bags are tagged, and more.
Search for Households…
This search bar is located just under the Dasboard title and above the Activities.
This is the best place to begin your Check-In process.
Click Here to walk through an example of the process in our The Check-in Process support article.
Activity Attendance
Located to the far right of each Activity button is a number indicating how many attendees are checked-in to that Activity at the present.
Clicking on the Activity button will bring up the detailed attendance.
Settings
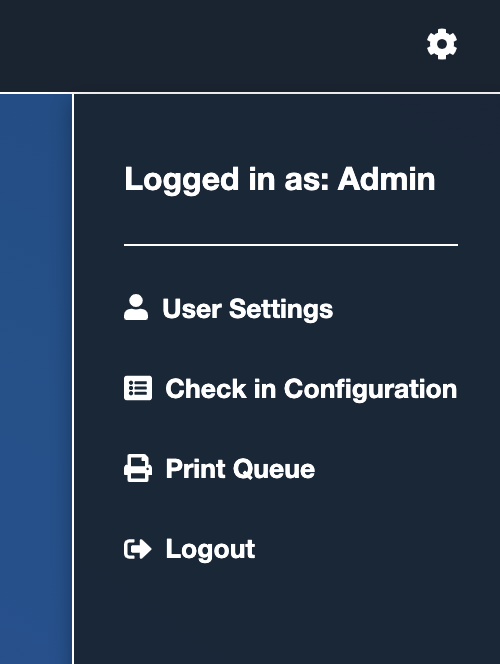
In the top right corner of the Dashboard, the gear/settings icon will bring up a menu with additional settings and utilities.
User settings will direct you to the Utilities page and show the permissions of the user that is currently logged into Empower.
Check in Configuration
The Check-In Configuration button is where we will set up the station and printer settings.
To walk through the station and printer setup, see the Check in Configuration support article here.
Print Queue
Missing a label? The Print Queue will show all Pending and Printed labels for the most recent session. Print Queue shows the status of the label(s) being printed and allows you to reprint labels as necessary.
Logout
Clicking this button will log the user out of Empower completely.