Adding, Editing, and Organizing Attribute Fields
By now, you’ve begun to see just how powerful Empower is. Your congregation is getting settled into their Households, and data is entered, but it sure would be nice to be able to track that other detail that’s missing.
Navigating to the People page (Membership>People), you will find quite a few profile fields already set up. We walked through how to use these default fields in the Understanding the People Page article. Now, let’s walk through just how to add, edit, and organize a new field.
The first thing we will do is navigate to the Utilities>Options page. Once there, scroll down the Navigation Pane to Personal Attributes. You will notice these attributes are familiar to those listed on the People page. If there are any changes you’d like to make or additional options you would like to add, do that here.
Editing an Attribute
To edit an existing attribute, click on the 
You can also change the Group the attribute is a part of for better organization. To create a new Group, just click in the Group field and type your new Group name. The Order field determines the priority in which that group shows on the profile. The higher the number, the further down the profile it will appear.
Adding an Attribute
For this example, we’ll walk through the steps of adding the ability to track “Date of Baptism.”
Under the Personal Attributes options page, click Add New Attribute Title in the top right corner.

The Attribute Title window will pop-up.
We will create a Title called “Baptism.”
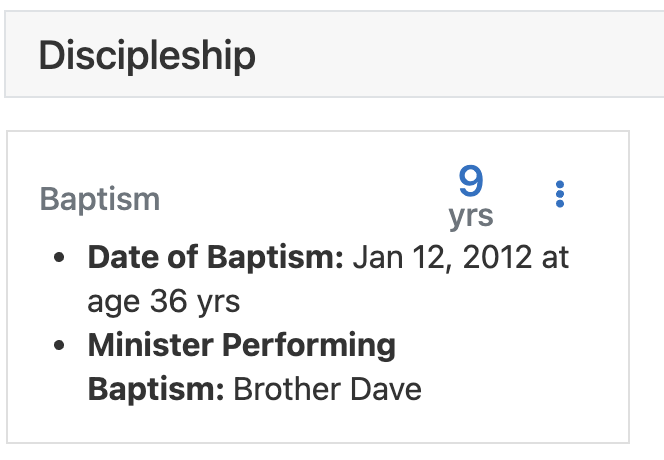
We will also create a Group called “Discipleship,” and the Order will be set to 4; placing it at the bottom on the profile page. .”
We’re looking to track two things. The Date of Baptism and the Minister Performing the Baptism.
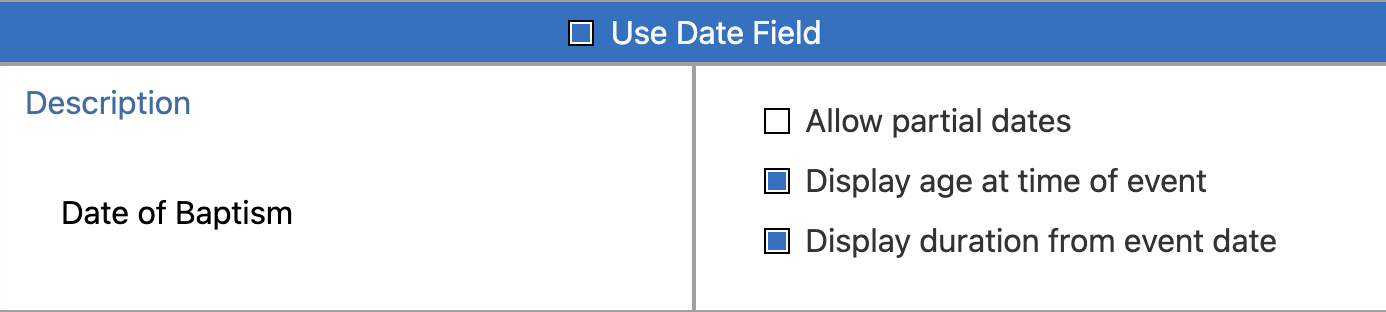
Toggle the Use Date Field and add the description “Date of Baptism.” We will choose to Allow partial dates for this example. We want to display the individual’s age at the time of the event as well as display the duration from event date; therefore, we will toggle those boxes.”
We will toggle the Use note field too and describe it as “Minister Performing Baptism.”

Click Save Changes. It’s ready for your data. Let’s take a look at a Profile to see how it looks.
Once you’ve added your data, you should find it to look like this:
Remember, the possibilities are plentiful. If you have any questions about tracking a specific detail, please reach out to us via our Contact Support page. We’re here to help, and we’re always willing to look at adding new features to do so.